topics
- Home
- Partner Platform
- Using the Partner Platform as an AWS Service Provider
Complete Additional Configuration
January 7, 2025
After creating AWS Partner and customer accounts, you can:
- Set up partner generated billing (PGB)
- Co-brand the AWS partner platform
- Add global bill currency configuration
- Send Azure billing files to an AWS S3 Bucket
- Create cost and usage reports (CUR) for the customer
- Add custom text to a partner generated bill
- Update CloudFormation templates
Bill Customers Using AWS Partner Billing Rules
Partner Billing rules allow partners to adjust customer costs globally or for specific customers. You can use custom billing rules to charge for, or credit, additional line items not included in the original bill. You can set up a one-time billing rule, or create a recurring rule. Billing rules can be applied at a flat rate, or as a percentage of the customer’s spend.
There are two types of AWS partner billing rules:
- AWS Support: Creates a standard billing rule. You can assign only one AWS support rule per customer.
- Custom Line Item: Can be used to create a specialized billing rule, such as a credit or recurring charge. You can assign multiple custom line item rules to a customer.
Create an AWS Support Rule
-
Log in to the CloudHealth Platform as a partner. From the left menu, select Partner > Partner Billing > Billing Rules. Then click New Partner Billing Rule.
-
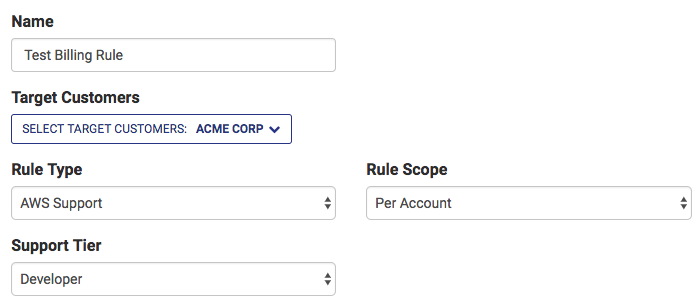
Configure the rule parameters:
- Name the rule so that you can identify it later in the CloudHealth Platform.
- Specify Cloud as AWS.
- Select one or more Target Customers to which this rule applies.
Note: Target customers must have accounts set up in them to set up billing rules. If the target customer has no accounts, the selected target customer will not be added to the billing rule.
- Specify Rule Type as AWS Support.
- Select a Rule Scope from the dropdown:
- Per Account: Applies charges to each account on a billing statement. For example, a charge of $500 to a bill with three accounts results in a total charge of $1500.
- Per Billing Family: Applies charges only to the first account on a billing statement. For example, a charge of $500 to a bill with three accounts results in a total charge of $500.
Credits are always applied to the consolidated bill account only on a billing statement.
- Specify your customer's AWS support tier.
-
Select one of the following Actions and, if necessary, enter the pricing information.
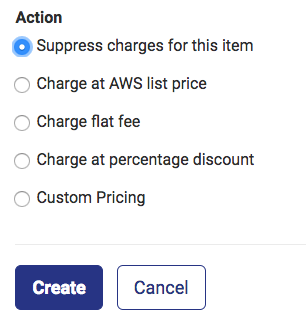
-
Click Create.
Create a Custom Line Item Using Billing Rules
You can use custom billing rules to charge for, or credit, additional line items not included in the original bill. Billing rules can be applied globally across all accounts, or on a single customer. You can set up a one-time billing rule, or create a recurring rule. Billing rules can be applied at a flat rate, or as a percentage of the customer’s spend.
-
Log in to the CloudHealth Platform as a partner. From the left menu, select Partner > Partner Billing > Billing Rules. Then click New Partner Billing Rule.
-
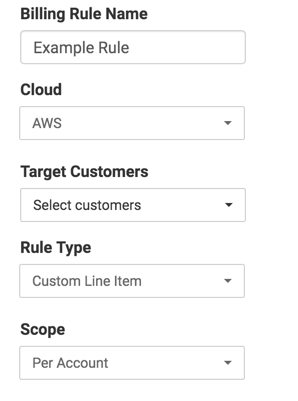
Configure the rule parameters.
- Name the rule so that you can identify it later in the CloudHealth Platform.
- Specify Cloud as AWS.
- Select one or more Target Customers to which this rule applies.
- Specify Rule Type as Custom Line Item.
- Select a Rule Scope from the dropdown:
- Per Account: Applies charges to each account on a billing statement. For example, a charge of $500 to a bill with three accounts results in a total charge of $1500.
- Per Billing Family: Applies charges only to the first account on a billing statement. For example, a charge of $500 to a bill with three accounts results in a total charge of $500.
Credits are always applied to the consolidated bill account only on a billing statement.
-
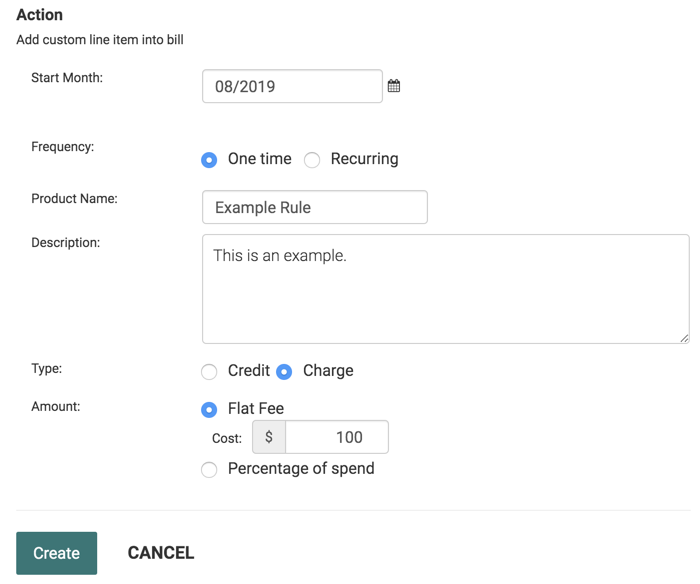
Select a Start month when the rule goes into effect and specify the frequency of rule application.
Partner billing is run for only the current month. To apply the new rule to a previous month, contact Support and request partner billing be rerun for that month.
-
Enter a Product Name and Description for the rule type.
-
Select Type to define how the cost adjustment appears in the customer's statements (as a credit or as a charge).
-
Select an Amount. In the case of Flat Fee, the Product name, Description, and cost are entered as a line item in the bill. In the case of Percentage of spend, the specified percentage (markup or discount) is applied to each line item.
-
Click Create.
Co-brand the AWS Partner Platform
You can co-brand the CloudHealth Partner Platform so that your customers see your logo and branding when they log in to the CloudHealth Platform.
-
Log in to the CloudHealth Partner Platform. From the left menu, select Setup > Admin > Settings.
-
Scroll to the Partner Settings section. In the Account Logo section, click Choose file to upload a logo.
The logo must meet the following requirements:
- Format: PNG
- Dimensions: 150px x 130 px
-
Click Update Company Profile.
Results: When your customers log in, the logo appears in the top-left corner of the CloudHealth platform.
Add Global Bill Currency Configuration
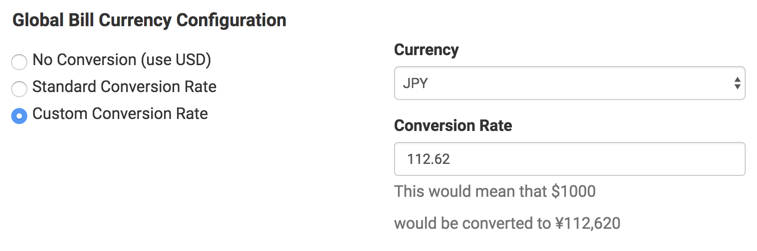
If the majority of your customers are billed with the same currency conversion rate, configure a global bill currency conversion rate and assign the global setting to your customers. If the global bill currency configuration changes in the future, you can simply update the global bill currency conversion rate instead of manually updating the rate for each customer.
- In Setup > Admin > Settings, select a global bill currency configuration:
- No Conversion: Select if your customers are billed with US dollars and do not require any currency conversion.
- Standard Conversion Rate: Select if your customers are billed with a different currency than US dollars and you want to use standard currency conversion rates. Select the currency, the day of the month the currency conversion should begin on, and whether the currency conversion should begin for the current month or next month.
- Custom Conversion Rate: Select if your customers are billed with a different currency than US dollars and you want to specify a different conversion rate than the standard rate. Select the currency and the conversion rate.
 2. Select the Single Sign-On tab and click Update Company Profile.
When you add linked customer tenants, you can assign the customer to the global bill currency conversion.
2. Select the Single Sign-On tab and click Update Company Profile.
When you add linked customer tenants, you can assign the customer to the global bill currency conversion.
Send Azure Billing Files to AWS S3 Bucket
You can opt to send your Azure billing files to the same AWS S3 bucket specified in the Bill Generation S3 Bucket field. This is useful if you want to use automation to extract billing files from the S3 bucket for invoicing.
- In the Partner tenant in the CloudHealth Platform, navigate to Setup > Admin > Settings and scroll to the Partner Billing section.
- Toggle the Upload Azure Billing Records to Bill Generation S3 Bucket setting to ON.
 3. Click Update Customer Settings.
Create a Cost and Usage Report at the Partner Customer Level
A Cost and Usage Report (CUR) has already been configured at the partner level. However, it can be helpful for partner customers to maintain their own CURs. For example, if a third-party tool needs access to only the partner customer's data, using the partner customer's CUR prevents the third-party tool from gaining unnecessary access to data belonging to the partner's other customers.
- You can create a CUR only for a partner customer account designated as Standalone or Consolidated in Partner Generated Billing. To verify a partner customer account type, go to Partner > Customer > List and click the edit icon next to the Customer Name. Scroll down the Customer page to verify the billing blocks configured. Please note that only Standalone and Consolidated blocks are supported, and Full account family is not supported.
- You need to review the customer's billing configuration within the CloudHealth partner tenant but add the Cost and Usage Report > Bucket Name within the customer tenant. (Refer to Step 13)
-
Log in to the AWS Console as the partner customer.
-
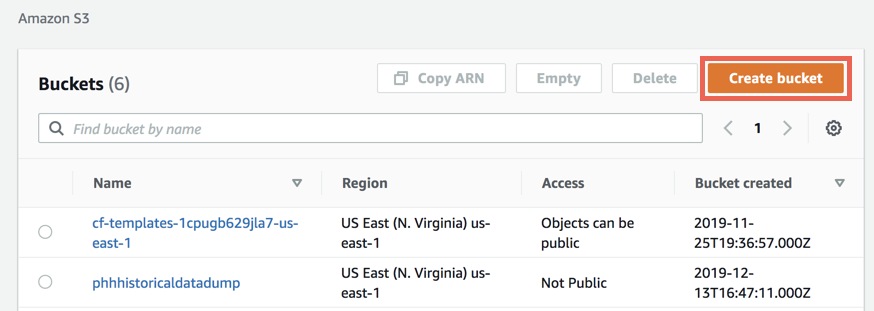
Go to Services > S3 and click Create Bucket to create a new S3 bucket to hold the partner customer's generated billing files.
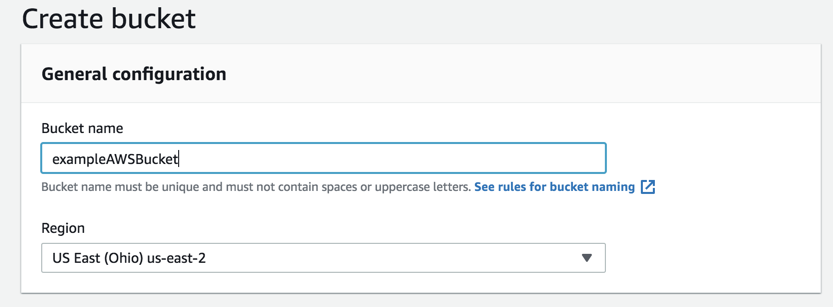
- Enter the Bucket Name and select a Region for your bucket. Edit any properties and permissions, review your changes, and click Create bucket.
-
In a new tab, log in to the CloudHealth Platform as the customer tenant. Go to Setup > Accounts > AWS.
-
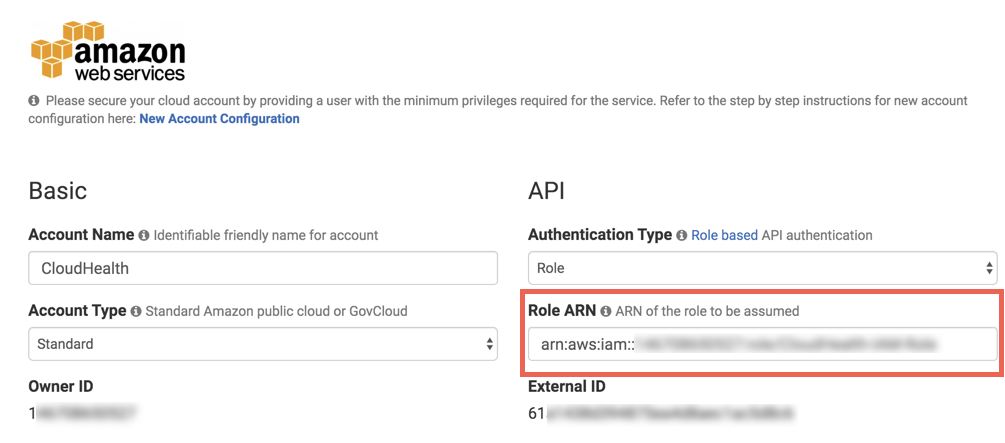
Select the Standalone or Consolidated account you are adding a CUR to. Copy the Role ARN of that account into a text file.
-
Return to the AWS Console and go to Services > IAM.
-
In the left menu, select Roles and open the role matching the Role ARN you copied in step 5.
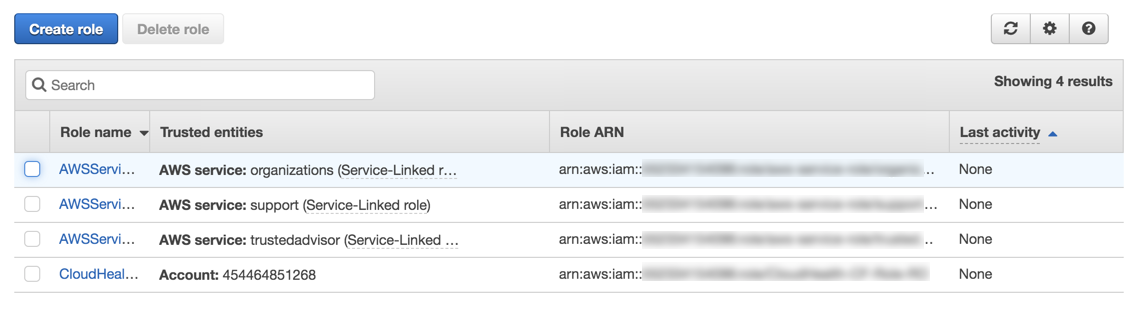
- On the Role Summary page, select Attach Policies.
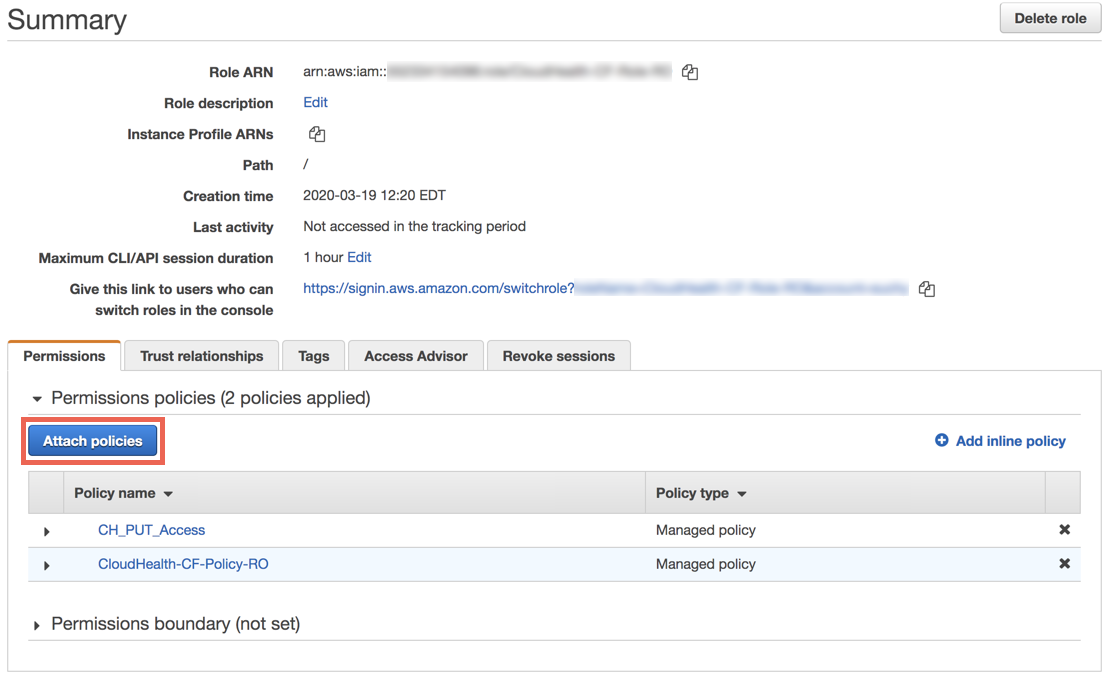
- Click Create Policy to create a new policy for the IAM role.
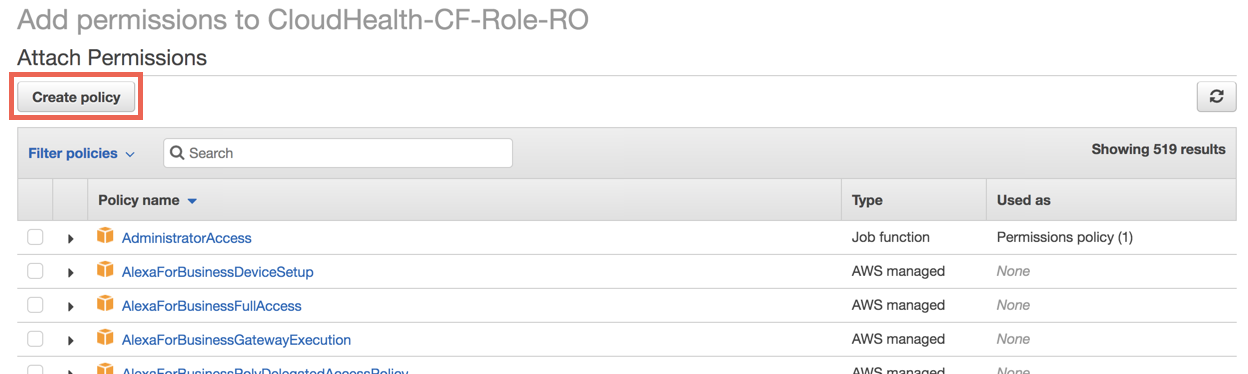
- On the Create Policy page that appears, switch to the JSON tab.
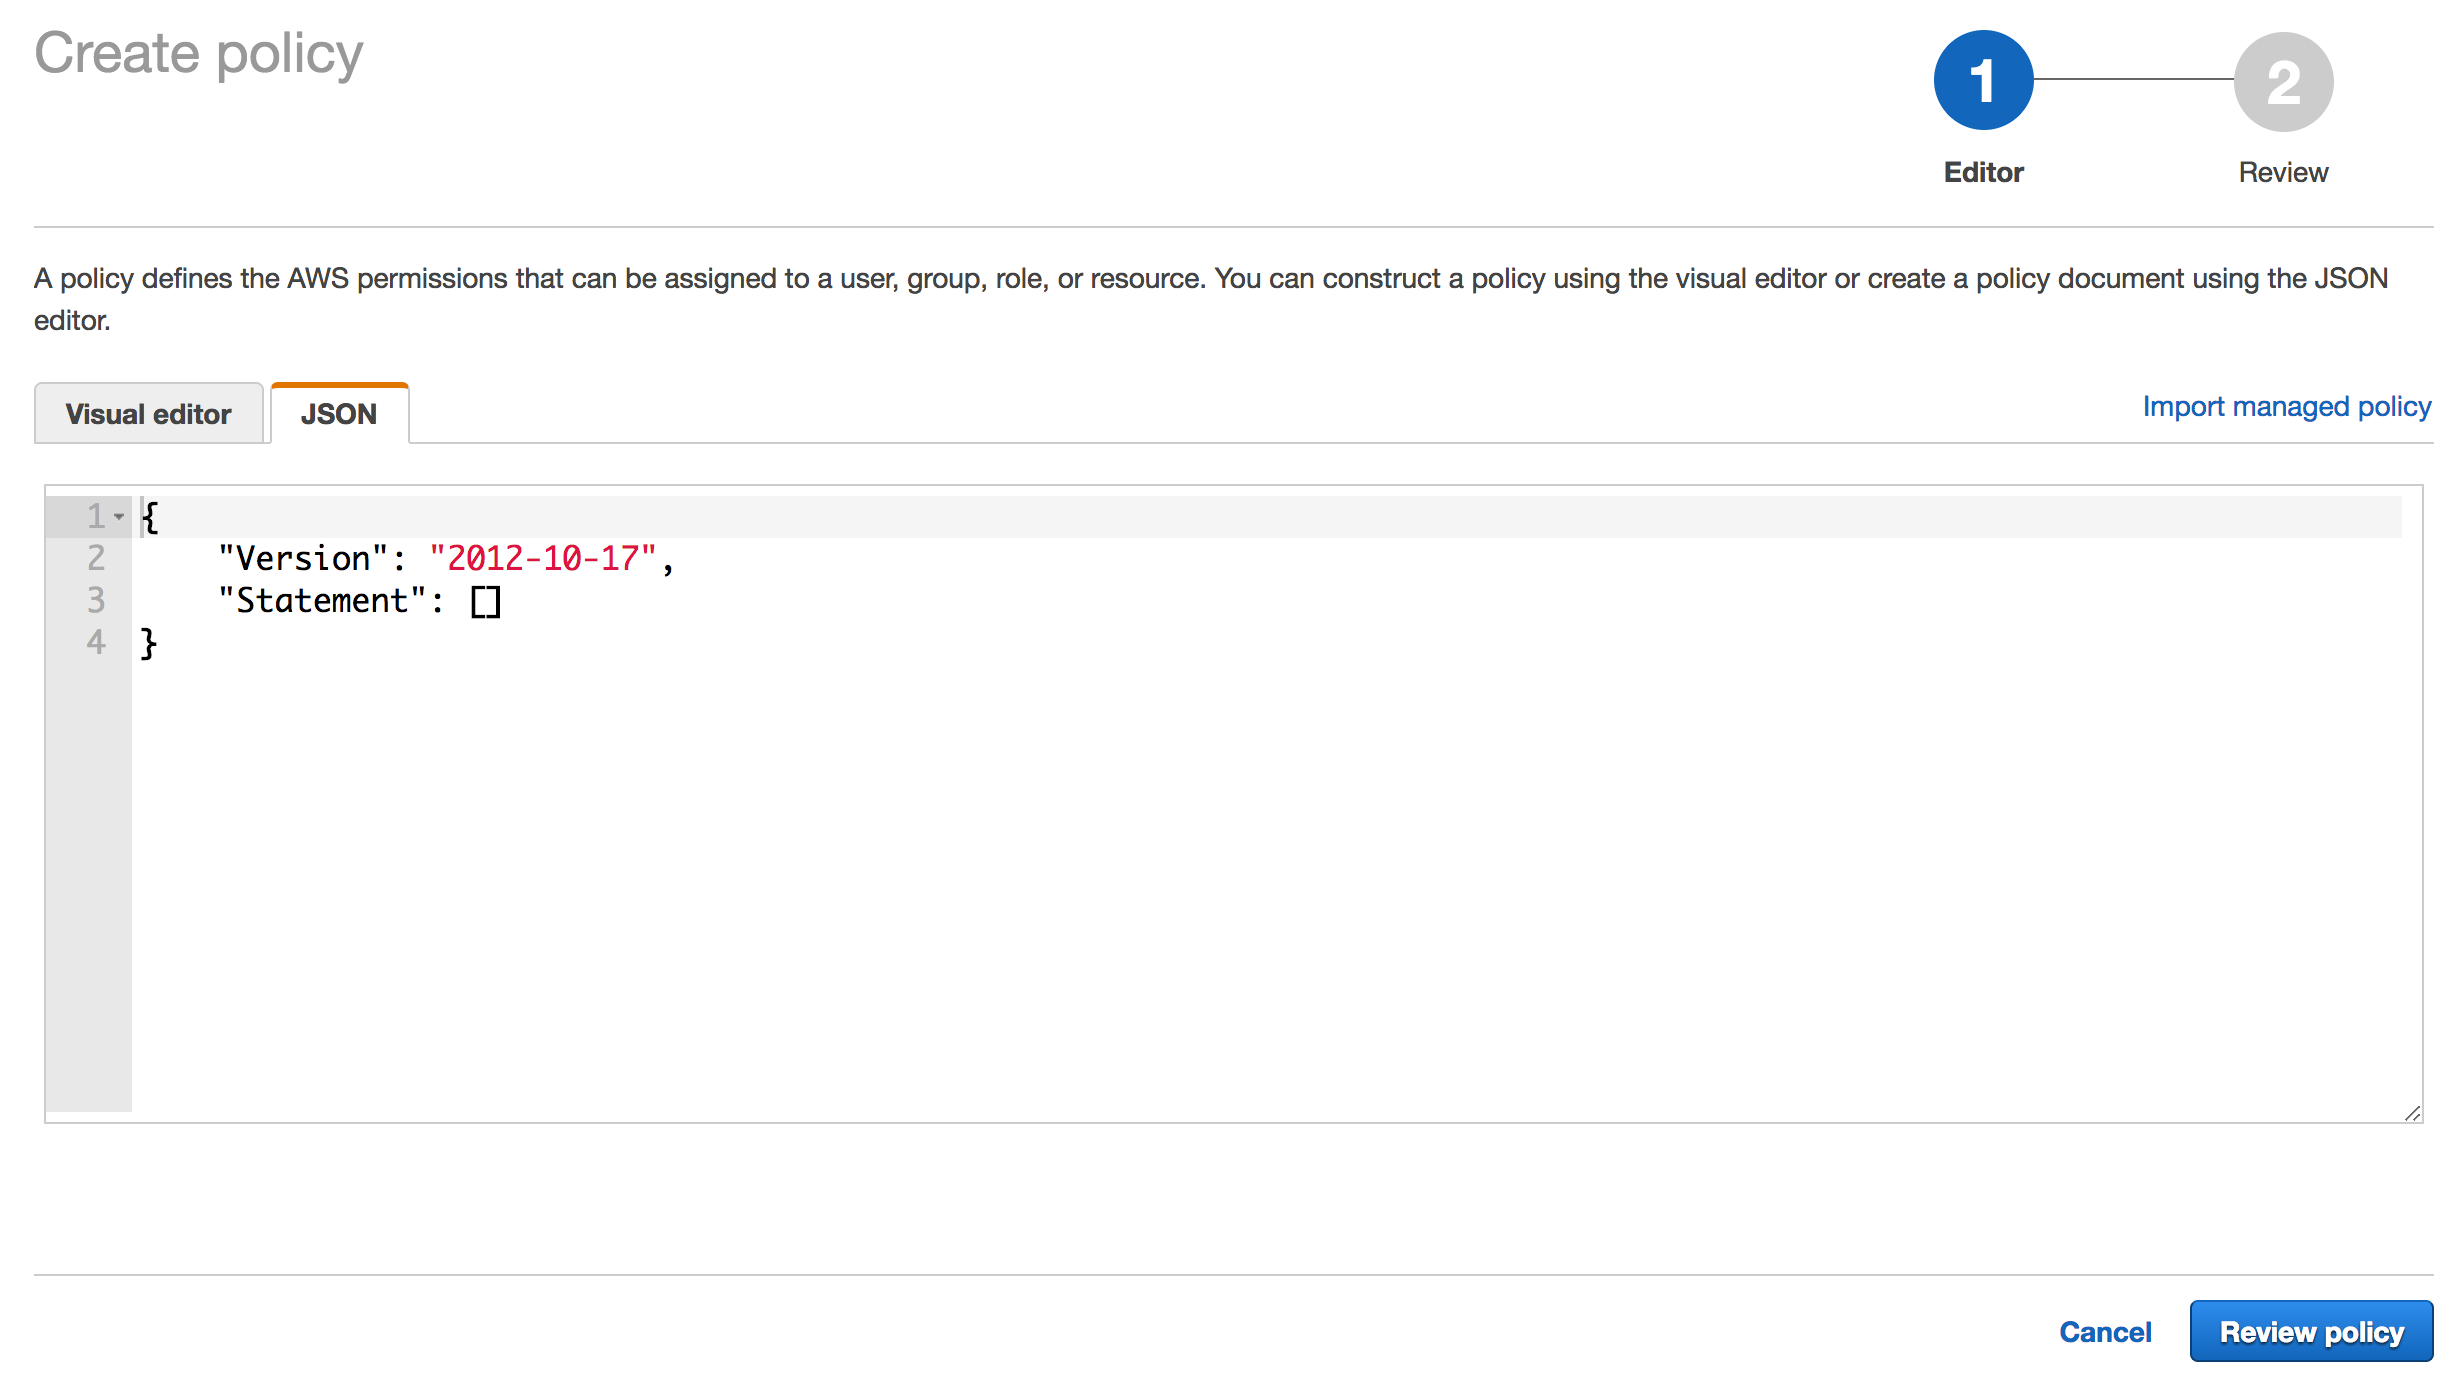
- Paste the following text in the policy text editor to authorize CloudHealth to deposit individual customer billing records in your S3 bucket. Replace
<billingBucketName>with the name of the S3 bucket you created in step 2. Review and save the policy.
   {
       "Version": "2012-10-17",
       "Statement": [
           {
               "Effect": "Allow",
               "Action": "s3:PutObject",
               "Resource": [
                   "arn:aws:s3:::<billingBucketName>",
                   "arn:aws:s3:::<billingBucketName>/*"
               ]
           }
       ]
}
-
Return to the CloudHealth Platform. Go to Setup > Accounts > AWS and open the account you copied the role ARN from in step 5.
-
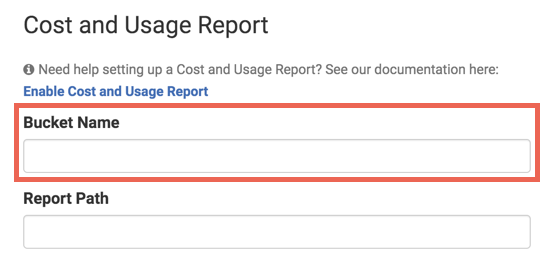
In the Cost and Usage Report section, enter the name of the S3 bucket you created in step 2.
Enter only a Bucket Name and not a Report Path as defining a report path is not supported for uploads.
- Click Save Account.
Repeat these steps for standalone and consolidated AWS accounts as needed.
Add Custom Text to a Partner Generated Bill
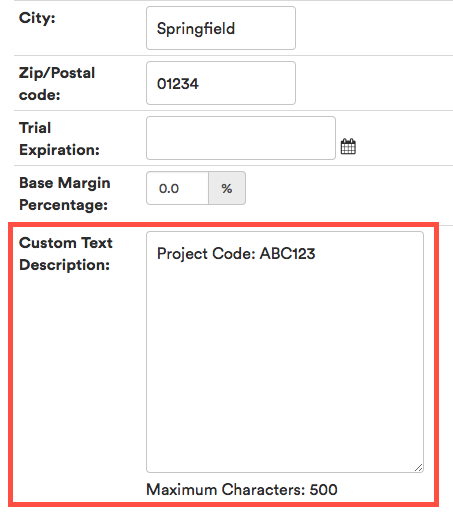
You can add a custom description to the Partner Generated Bill PDF your customers receive. For example, you can use the custom description to include a project code or remittance address.
The custom description can contain up to 8 lines of text.
-
In the CloudHealth platform, go to Partner > Customer > List.
-
Edit the customer whose bill you want to add custom text to.
-
In the Custom Text Description field, enter the custom text.
-
Click Update.
Update CloudFormation Templates
As AWS adds new services and permissions, you may need to periodically update the IAM permissions to include those products. If your IAM permissions were configured using CloudFormation templates, you can update the appropriate templates in the S3 bucket.
Update CloudFormation Template
-
Log in to the AWS Console and go to Services > Storage > S3.
-
Open the bucket to which you saved the CloudFormation templates.
-
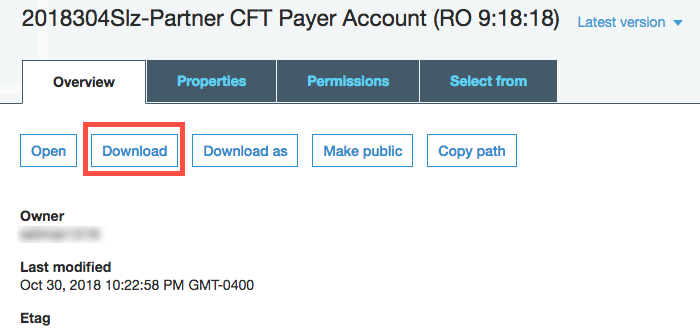
Download the CloudFormation template that requires edits.
-
Modify the CloudFormation template as needed and save.
-
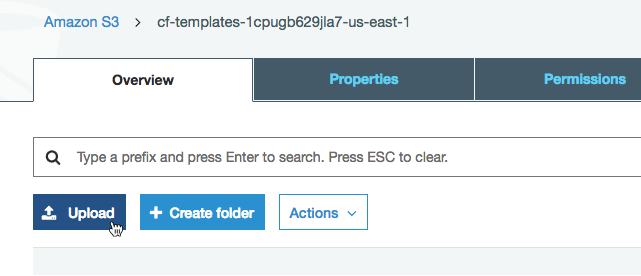
In the S3 bucket in the AWS Console, select Upload and upload the modified template.
-
Contact your customers and tell them to update the CloudFormation stacks that the modified CloudFormation templates were linked to.
Update CloudFormation Stack
-
Log in to the AWS Console and go to Services > Storage > S3.
-
Open the S3 bucket containing the CloudFormation templates and select the new modified template. Copy the template link.
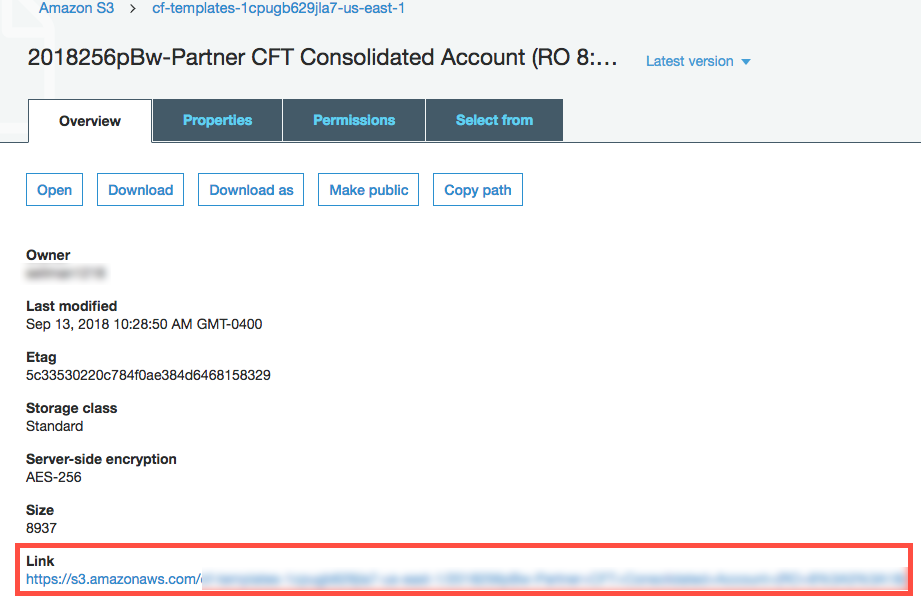
-
Go to Services > Management Tools > CloudFormation.
-
Select the stack that the modified CloudFormation template was linked to. Select the Actions dropdown and select Update Stack.
-
Update the Amazon S3 template URL for the link you copied in Step 2.