topics
- Home
- Getting Started
- Google Cloud Platform Account Setup
Configuring GCP Accounts at the Organization Level using gcloud
January 7, 2025
Benefit: CloudHealth is granted access to all projects in the billing account at the organization level.
Overview: Create a custom role and IAM member at the organization level and assign the role and IAM member to the service account. When new projects are added to the billing account, the organization-level role and IAM member are automatically inherited by the new projects.
You must create a new custom role for the organization level setup, even if you already have created a Owner role or your default Editor role has all the permissions.
Use When:
- You want easy maintenance.
- You don't want to create a new custom role or IAM member for each newly created project.
- You want to update only the organization-level role each time CloudHealth adds support for a new service.
Configuring GCP Accounts in gcloud The gcloud command-line interface (CLI) is the primary CLI to the Google Cloud Platform. You can use this CLI in place of the Google Portal interface to programmatically configure your billing account in the CloudHealth platform. To use gcloud, you can either use Cloud Shell in the Google Console or Download and install the Google Cloud SDK.
- Locate Project ID and Organization ID (gcloud)
- Create a Custom Role (gcloud)
- Create a Dataset for BigQuery (gcloud)
- Enable APIs for All Projects (gcloud)
- Enable BigQuery API (gcloud)
- Create a Service Account (gcloud)
- Create a Service Account Key (gcloud)
- Download the Service Account Key (gcloud)
- Assign Custom Role to the Service Account (gcloud)
- Create an IAM Member at the Organization Level (gcloud)
- Enable BigQuery in the Google Console (gcloud)
- Configure Billing Account in CloudHealth (gcloud)
Locate Project ID and Organization ID (gcloud)
To configure the GCP billing account using gcloud CLI, you need the project ID of a project assigned to that billing account and your organization ID. When you complete configuration, all projects assigned to the billing account are pulled into the CloudHealth Platform.
If you have already enabled BigQuery, use the project that contains your BigQuery dataset. Otherwise, you can use any project assigned to the billing account.
To ensure that billing data isn't lost, use the project ID of a project that won't be deleted.
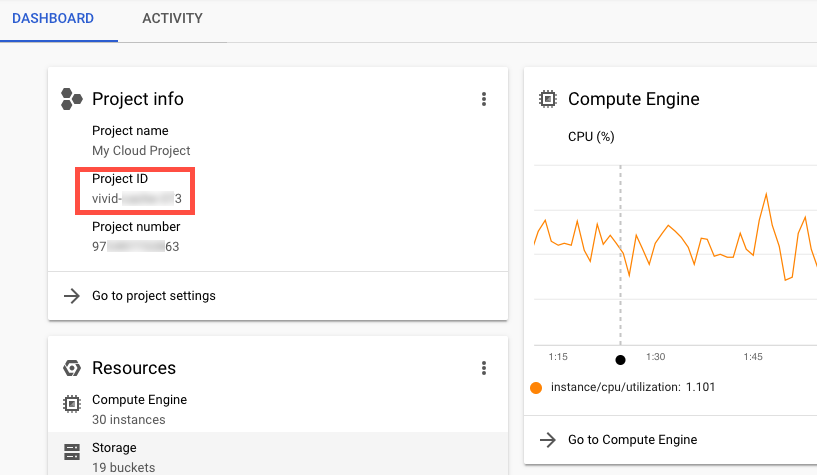
The project ID is located in the Project Info pane of the Dashboard in the Google Cloud Console.
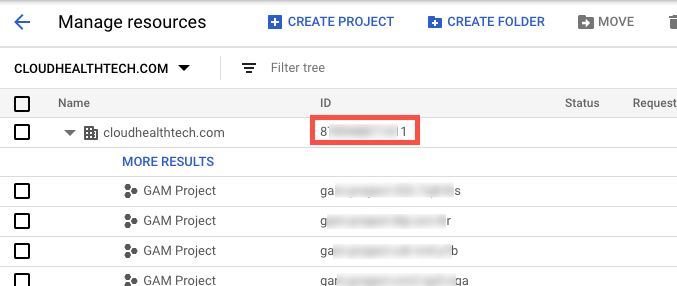
The organization ID is located in IAM & admin > Manage resources in the Google Console.
Create a Custom Role (gcloud)
Enter the following command to create a custom role with the permissions CloudHealth requires at the organization level.
- Replace
<insert org id>with the ID of your organization. - Replace
<insert custom role name>with the name of the new custom role.
    gcloud iam roles create <insert custom role name> --organization <insert org id> \
    --title <insert custom role name> --description \
    "Used to collect CloudHealth Billing and Usage data" --permissions \
    resourcemanager.projects.get,compute.disks.get,compute.disks.list,compute.images.get,compute.images.list,compute.instances.get,compute.instances.list,compute.projects.get,compute.regions.get,compute.regions.list,storage.buckets.get,storage.buckets.list,bigquery.datasets.get,bigquery.jobs.create,dataproc.clusters.list,compute.addresses.list,container.clusters.list,bigquery.tables.get,bigquery.tables.getData,compute.snapshots.get,compute.snapshots.list,compute.zones.get,compute.zones.list,recommender.computeInstanceMachineTypeRecommendations.get,recommender.computeInstanceMachineTypeRecommendations.list,recommender.computeInstanceMachineTypeRecommendations.update,recommender.locations.get,recommender.locations.list \
    --stage GA
Create a Dataset for BigQuery (gcloud)
If you have already enabled BigQuery in the Google Console, skip this step.
Enter the following command in the gcloud CLI to create a dataset to use later when enabling BigQuery.
- Replace
<insert project ID>with your project ID. - Replace
<insert dataset name>with your dataset name.
bq mk <insert project id>:<insert dataset name>
Enable APIs for All Projects (gcloud)
Enter the following command in the gcloud CLI to allow CloudHealth to gather cost and tagging information for your projects. This command enables the following APIs:
- Google Compute Engine API
- Google Cloud Storage API
- Google Cloud Resource Manager API
- Google Cloud Storage JSON API
- Recommender API
- Kubernetes Engine API
- Dataproc API
- BigQuery API (See Step 5)
for project in $(gcloud projects list --format="value(projectId)")
do
if [[ $(gcloud beta billing projects describe $project --format="value(billingEnabled)") = "True" ]];
then
echo "ProjectId: $project - Enabling APIs..."
gcloud services enable compute.googleapis.com \
cloudresourcemanager.googleapis.com \
storage-component.googleapis.com \
recommender.googleapis.com \
container.googleapis.com \
dataproc.googleapis.com \
--project $project
fi;
done
This gcloud command only enables the APIs for existing projects. If you create new projects in the future, you must manually enable the above APIs for the new projects. Allow about 32 hours for the platform to collect and process the data from GCP to project the cost.
Enable BigQuery API (gcloud)
Enter the following command in the gcloud CLI to allow CloudHealth to gather data from your BigQuery dataset. Replace <insert project ID> with your project ID.
gcloud services enable bigquery-json.googleapis.com --project <insert project id>
Create a Service Account (gcloud)
Enter the following command in the gcloud CLI to create a service account.
- Replace
<insert project ID>with your project ID. - Replace
<insert service account name>with your new service account name.
gcloud iam service-accounts create <insert service account name> --project <insert project id>
Create a Service Account Key (gcloud)
Enter the following command in the gcloud CLI to create a private key for the newly created service account and to save the key to the $HOME directory of your instance.
- Replace
<insert project ID>with your project ID. - Replace
<insert service account name>with your service account name. - Replace
<insert private key name>with your new private key name.
gcloud iam service-accounts keys create \
--iam-account <insert service account name>@<insert project id>.iam.gserviceaccount.com <insert private key name>.json
Download the Service Account Key (gcloud)
Enter the following command in the gcloud CLI to download the service account key to your local machine. Replace <insert private key name> with your private key name.
cloudshell download <insert private key name>.json
Assign Custom Role to the Service Account (gcloud)
Enter the following command to assign the custom role you created in Step 2 to the service account.
- Replace
<insert service account name>with your service account name. - Replace
<insert project ID>with your project ID. - Replace
<insert org id>with your organization ID. - Replace
<insert custom role name>with the custom role name.
gcloud projects add-iam-policy-binding <insert project id> --member serviceAccount:<insert service account name>@<insert project id>.iam.gserviceaccount.com \
--role organizations/<insert org id>/roles/<insert custom role name>
Create an IAM Member at the Organization Level (gcloud)
Create an IAM member for your organization with the custom role you created in Step 2.
- Replace
<insert service account name>with your service account name. - Replace
<insert org id>with the ID of your organization. - Replace
<insert project ID>with your project ID. - Replace
<insert custom role name>with the name of the new custom role.
gcloud organizations add-iam-policy-binding <insert org id> --member user:<insert service account name>@<insert project id>.iam.gserviceaccount.com \
    --member serviceAccount:<insert service account name>@<insert project id>.iam.gserviceaccount.com \
--role organizations/<org id>/roles/<insert custom role name>
Enable BigQuery in the Google Console (gcloud)
Enabling BigQuery can only be completed in the Google Console.
Use the dataset you created previously as your BigQuery dataset. If you have already enabled BigQuery in the Google Console, skip this step.
Configure Billing Account in CloudHealth (gcloud)
You need to configure only the billing account. CloudHealth discovers all derived projects associated with the billing account that have incurred costs.
-
Log in to the CloudHealth platform and from the left menu, select Setup > Accounts > GCP Billing. Then click Add Account.
-
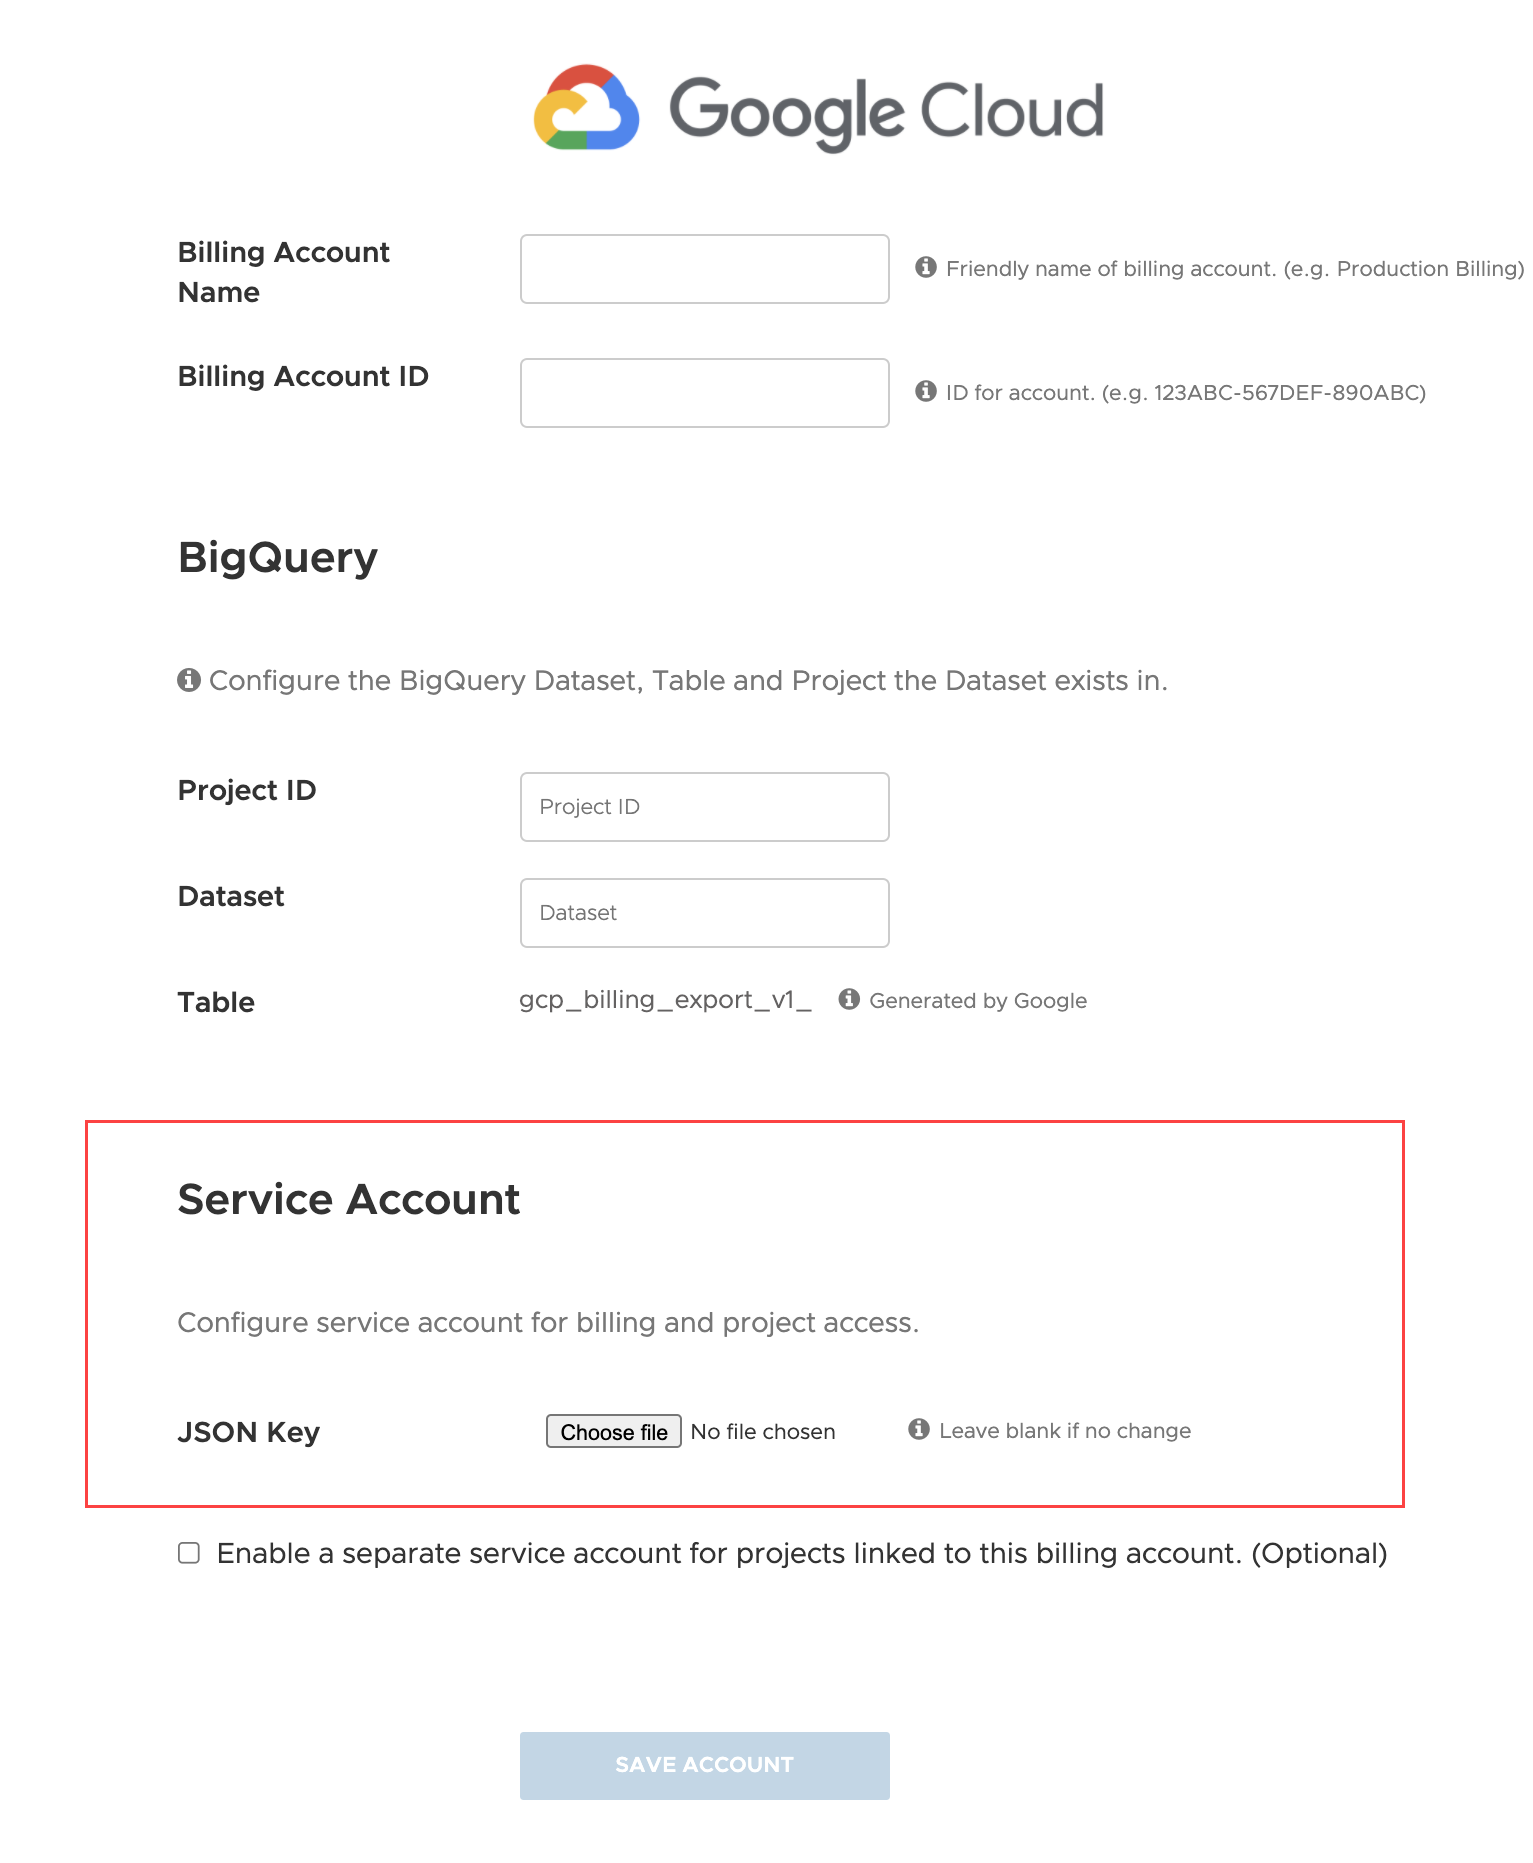
Enter your billing account, BigQuery, billing export, and service account information into the form. If needed, you can locate this information in the Google Cloud Console.
-
In Service Account section, select Choose file and upload the JSON private key.
When you use a JSON key, CloudHealth verifies that the project ID in the JSON key matches the ID of the project to which you are attaching the credentials.
-
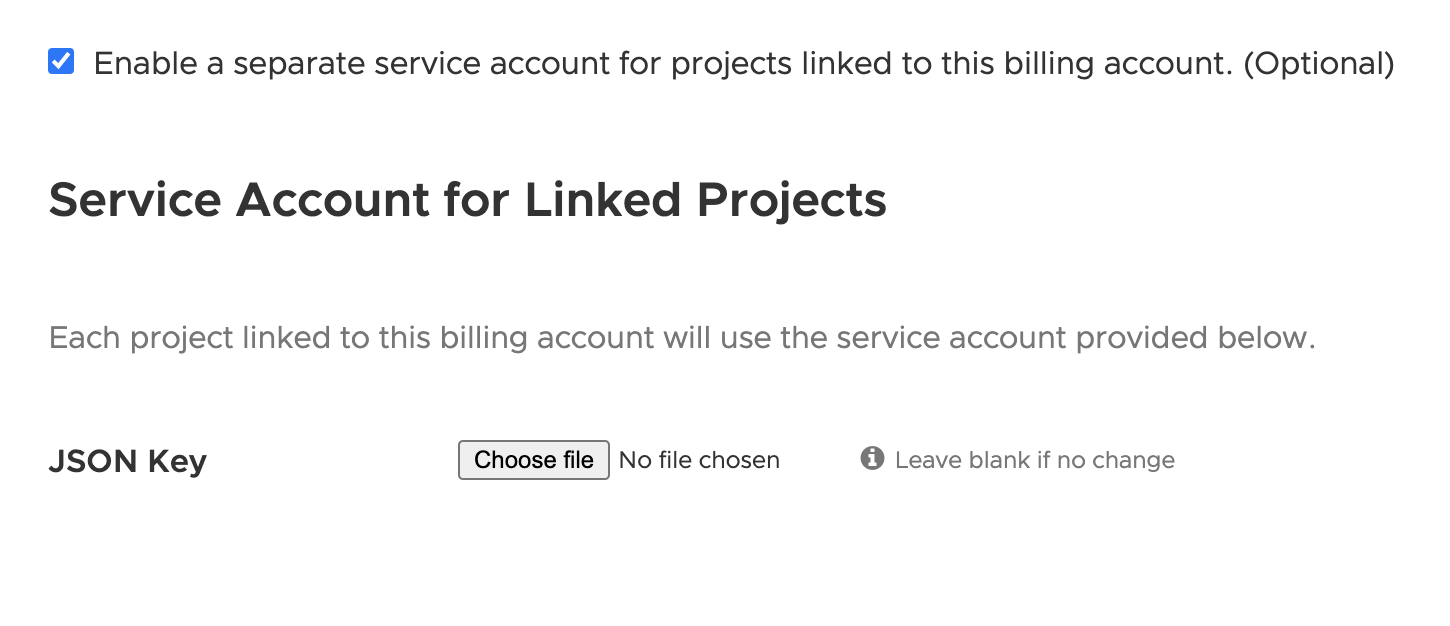
If you want to use different service accounts to collect billing statements, select the Enable a separate service account for projects linked to this billing account. (Optional) checkbox. Select Choose file and upload the JSON private key.
This option should be used if you want to use different service accounts for billing data collection and asset metadata collection.
- Click Save Account.
CloudHealth validates new Google Service Accounts and derived projects every 4 hours. You can view derived projects by going to Setup > Accounts > GCP Project. Projects you enable in the CloudHealth Platform change status from Not Configured to Green, Yellow, Red, or Pending.
The newly configured GCP billing accounts will be onboarded automatically, and within 48 hrs, you will see the cost data in the CloudHealth platform.